 This ornament was made using a Tim Holtz crystal and some ephemera. The ephemera was cut to fit behind this crystal. It was adhered using a clear art glue. This was very simple but with the lights on the tree it looks very ornate.
Saturday, December 10, 2011
Christmas Ornament #7 Mary and Angels
This ornament was made using a Tim Holtz crystal and some ephemera. The ephemera was cut to fit behind this crystal. It was adhered using a clear art glue. This was very simple but with the lights on the tree it looks very ornate.
Friday, December 9, 2011
Christmas Ornament #6 Hope
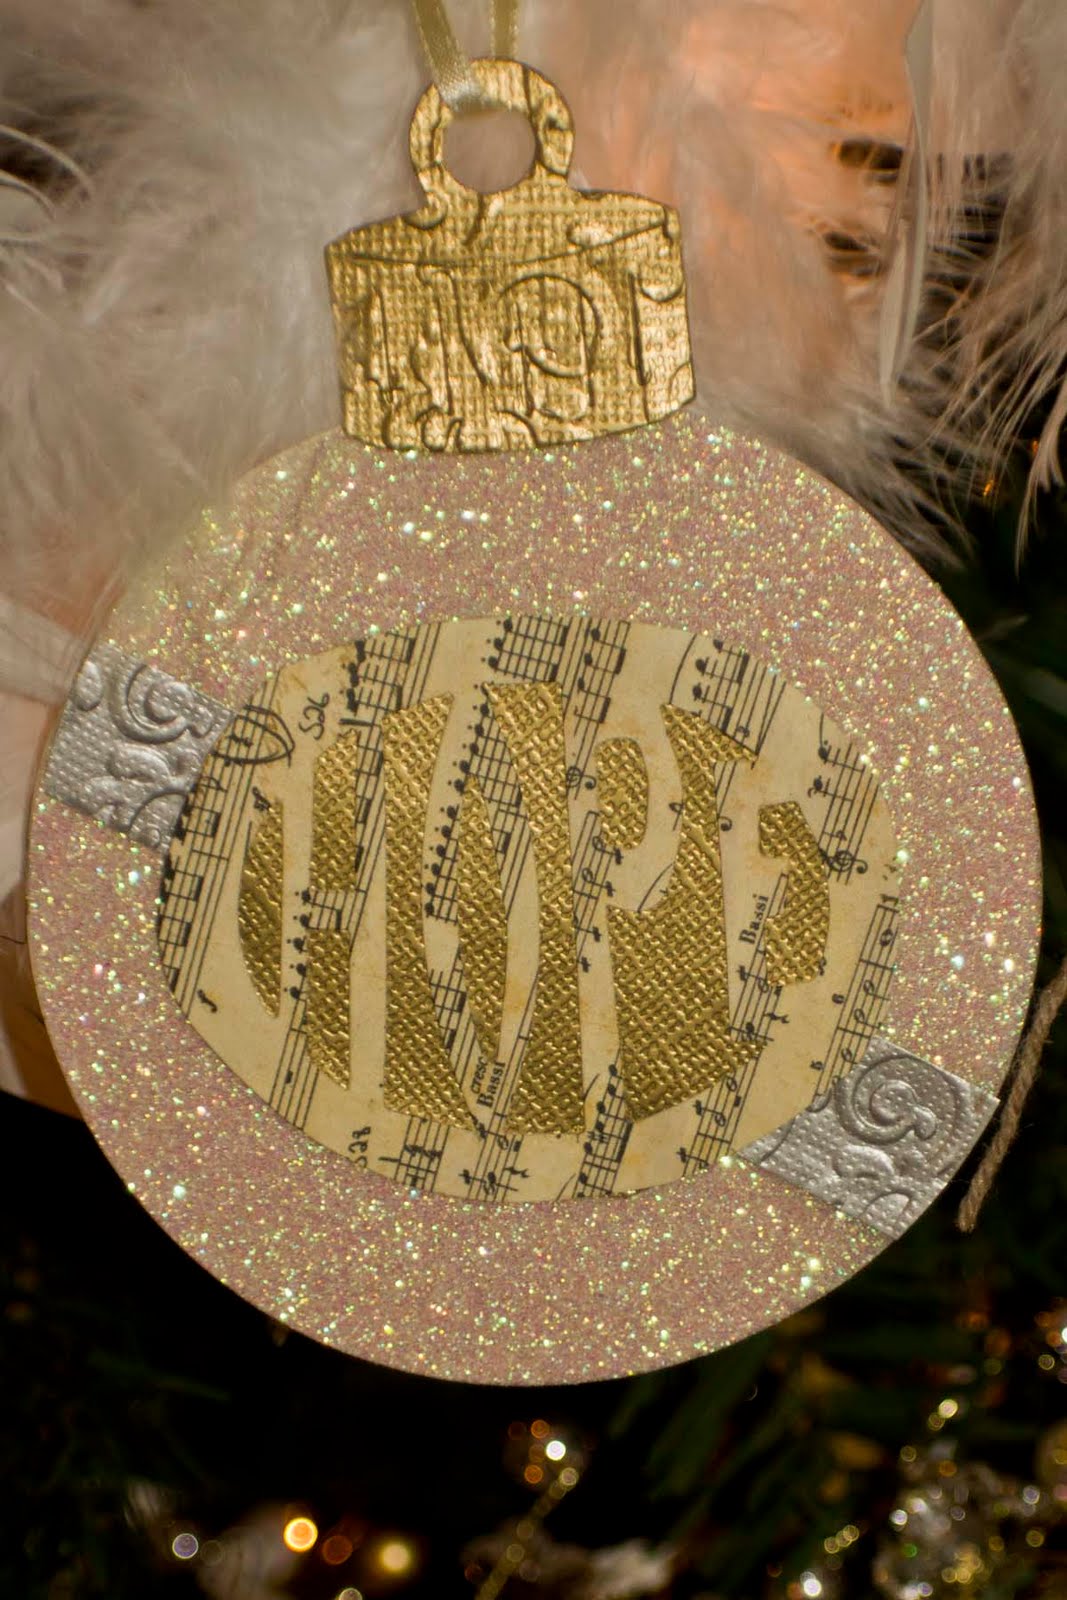
Ornament #6 was made with paper. There were four types of paper used. A glitter paper with a sticky back was used for the actual ornament. This was a sizzix die used with the die cutter. The silver paper was first embossed and then cut into a strip. It was placed across the bulb. The gold paper was also embossed and was cute for the ornament top. The word hope was cut using the Tim Holtz Hope die cut. It was layered on gold foil paper.
Tuesday, December 6, 2011
Christmas Ornament #5 Snowflake
 This ornament was made using the sizzix die cut. Cream wool fabric was used for the front of the ornament. The manilla folder was used for the back. Beads were sewn on the edges. An old button was finished using Rub 'n buff gold leaf.
Let it Snow!
Sunday, December 4, 2011
Christmas Ornament #4 Snowflake
 This snow flake ornament was made from a cream colored wool fabric. It was backed with a recycled manilla folder. The snow flake shape was cut with the accuquilt go cutter. I then embellished the snowflake with various beads and a vintage button in the center. I used rub 'n buff silver leaf to mask the rust on the button.
Let it snow.
Christmas Ornament #3 Keyhole
 This ornament was made with a faux swede fabric. It was cut using a die cut by sizzix. The cut an old manilla folder to stabilize the back. I added Tim Holtz music notes tape. Using metallic gold thread, I stitched the manilla folder and fabric together. Next, I had these rather inexpensive plastic beads in strips that were obtained at a yard sale. I was able to hand stitch those on with clear monofilament thread. I then stitched on the silver key hole that is from the Tim Holtz collection. Happy Holidays!
Saturday, December 3, 2011
Christmas Ornament #2
 The second christmas ornament was made from a bird die cut. This time I used my accuquilt die cut machine. It is just as fabulous as my vagbond. The fabric was a velveteen. The fabric was stamped with an antique brown ink and a snowflake stamp. The wing was made from a scrap of music note fabric. A bead was sewn on for the eye. To make the ornament a little more sturdy I backed it with a matching die cut from an old manilla folder.
 The theme this year is cream, gold, and silver. So far I am enjoying this immensely. I hope you are too.
Thursday, December 1, 2011
Christmas Ornament #1
 This ornament was made using the Sizzix die cut. The ornament was stamped onto an old manilla envelope. The top piece was covered in glue and then glitter was applied. The bird was a Fiskers punch and was made from scrap book paper. The back of the ornament was music note scrap book paper. It was covered with wax paper. The space in between was filled with glitter and beads. Happy Holidays
Subscribe to:
Posts (Atom)